For my son's birthday party I decided to make monster softies for favors. I searched online and found some cute patterns and I drew some of my own (which I haven't used yet) and everything seemed to be going fine until I got to the face. When it came time for me to make the face of the monsters I realized I didn't know the proper way to create a smile, so I asked my Nana.
Here's how you make a monster smile:
Supplies:
1. Fabric Marker
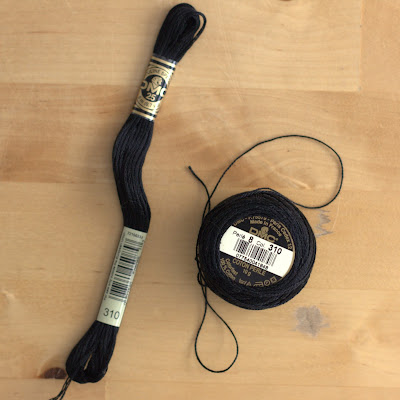
2. Two Strand Embroidery Floss (You can buy the kind on the left and separate the thread to be two strands or you can buy the kind on the right that comes with only two strands)
3. Print the monster pattern from One Charming Party
(I wrote a helpful tutorial on how to make and sew your own monster softie patterns here)
4. Hand Sewing Needle
4. Hand Sewing Needle
Instructions: (Disregard the pins in the pictures, you are making the face only on the front side of the softie.)
1. Take your disappearing ink fabric marker and draw the line of the smile. In my picture below you can faintly see the half of the smile not filled in yet.
2. Using the double strand embroidery floss, knot the end and start your first stitch. I made my stitches small (roughly 1/4") because I really wanted to make the curves of the smile. Step 3 will show you how to continue your stitches.
3. As you bring your needle up from underneath your fabric, you will separate the two strands of your thread and pull your thread through the opening.
 |
| See how I pulled my thread through the middle of my two strands? |
4. Continue sewing along your smile line and when you are done, knot the thread on the backside of your fabric.
On a side note, I made the eyes by cutting out my felt shapes and gluing them with felt glue. I let the felt glue dry and I reinforced the glue with stitches. Once I had the center of the eye secured I used embroidery thread (I liked the look of big noticeable stitches) to attach the eye to the face of the monster.


No comments:
Post a Comment