
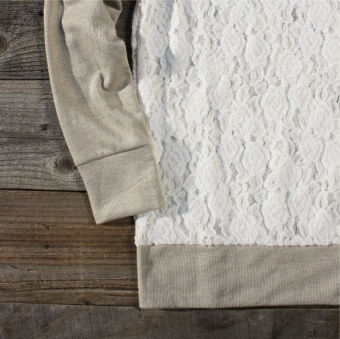
I love this sweatshirt, it's so simple, just lace sewn on a sweatshirt. I figured I could make my own for less than the $46 price tag. I did say that I have lace fever, right?
Try as I may, I could not find an oatmeal colored sweatshirt and cream fashion lace. Granted I was shopping at Walmart and JoAnn's...I hoped for something similar. I found a navy colored sweatshirt and coordinating lace at JoAnn's, that I thought would look smashing on my friend who also hearted this $46 sweater. I had the most difficult time selecting the lace to use for the project so I resorted to asking my 9 month old son. He always knows what to do when I can't make up my mind.
Here's how to make your own lace sweater:
Supplies:
1. Fleece Pullover Sweater (I found mine at Walmart, but Target also sells them)
2. Lace (matching or contrasting) - See my instructions below for how to buy your lace
3. Thread to match the color of the lace
4. Sewing Machine
5. Tailor's Chalk
6. Iron and ironing board
7. Scissors
How to Buy Your Lace:
* Measure the height and width of the sweater (both front and back)
* Look for fashion lace or apparel lace with stretch in it so it does not rip after it is sewn on the sweater.
* Find the direction of stretch, that will be the same direction for the width of the garment, cut/buy your fabric according to this measurement. Be sure to add 1/2"-1" or a little more on each side for the seam allowance.
Instructions:
1. Wash your sweatshirt and lace, follow the wash care instructions for each item.
2. Lay your lace over one side of the sweatshirt and carefully pin the lace (using the edge of your lace and line it up with the bottom band. Be sure to include 1/2"-1" for the seam allowance on each side of the lace.

3. Fold your lace over the garment. Due to the stretch direction of my lace, I folded the lace over the top of the sweater and pinned it to the back of the sweater.
4. Once the lace is even, laying flat and pinned to the sweater, leave 1/2"-1" for the seam allowance and cut off the excess material (mine was over the neck and shoulder area).
5. Now that you have the lace in the shape of the sweater you will unpin it from the sweater and pin it together with the wrong sides together (yes, I did say the "wrong sides"). We're going to sew french seams to keep the lace together and from fraying or ripping apart. Here is a great tutorial from Freshly Picked Blog.

6. With the wrong sides pinned together we are going to sew a 1/4" straight seam along the sides (for the time being leave the lace as a rectangle).
7. After you have sewn the sides and the top of the shoulder, you are going to flip the lace inside out and press out the seam (set the iron temperature to the appropriate setting for lace) so that it is flat.

8. When the seam is pressed out and the lace is turned so that the right sides are now facing, sew a 1/4" seam again. This will create a seam on both sides of the fabric. The edge of the first seam will be encased in the new seam. If there is any lace sticking out, be sure to trim it down so that it is not visible.
9. Almost finished sewing the sides! Yes, it's a lot of sewing but it will help the lace hold up and not fray. At this point you will have a seam on both sides. Take the side that is sticking out and iron it flat in one direction. You will lay down this part and sew a seam on the outside. After it is sewn the seam should lay nice and flat. You will end up with a rectangle of lace (we are not going to sew the lace to the sides of the sweater because it might tear when worn), we will trim the arms and neck lines next.
10. Pin the lace to the bottom band, position it how you would like it to show. We are pinning the lace to mark the arm and neck lines so you don't need to have it completely pinned ready to sew. If your lace does not have a decorative edge like mine, you will need to fold and hem the lace.

11. Take your tailor's chalk and trace the outline of the shoulder seam on your lace. Don't forget to trace the back of the arm too. Leave 1/2"-1" for the seam allowance.

12. Trace around the outside of the neck band so that you have 1/2"-1" for the seam. Trim the excess lace around the neck band. Remember you will also need to clip the lace along the curve of the arms and neckline so that it will fold nicely for the hem. For a good tutorial on how to clip curves, check out Ashley's tutorial here.


13. Pin and fold the hem of the arms and neckline along the existing seam.


14. After you have pinned and folded the seam you will begin sewing the lace down on the existing seam. Be sure to stretch the sweater as you sew the lace down so it maintains its stretch.

 | |
| Front |
 |
| Back |
 |
| Lace |
Here's how to make your own lace sweater:
Supplies:
1. Fleece Pullover Sweater (I found mine at Walmart, but Target also sells them)
2. Lace (matching or contrasting) - See my instructions below for how to buy your lace
3. Thread to match the color of the lace
4. Sewing Machine
5. Tailor's Chalk
6. Iron and ironing board
7. Scissors
How to Buy Your Lace:
* Measure the height and width of the sweater (both front and back)
* Look for fashion lace or apparel lace with stretch in it so it does not rip after it is sewn on the sweater.
* Find the direction of stretch, that will be the same direction for the width of the garment, cut/buy your fabric according to this measurement. Be sure to add 1/2"-1" or a little more on each side for the seam allowance.
Instructions:
1. Wash your sweatshirt and lace, follow the wash care instructions for each item.
2. Lay your lace over one side of the sweatshirt and carefully pin the lace (using the edge of your lace and line it up with the bottom band. Be sure to include 1/2"-1" for the seam allowance on each side of the lace.

3. Fold your lace over the garment. Due to the stretch direction of my lace, I folded the lace over the top of the sweater and pinned it to the back of the sweater.
4. Once the lace is even, laying flat and pinned to the sweater, leave 1/2"-1" for the seam allowance and cut off the excess material (mine was over the neck and shoulder area).
 |
| That's my Christmas tablecloth in the background |
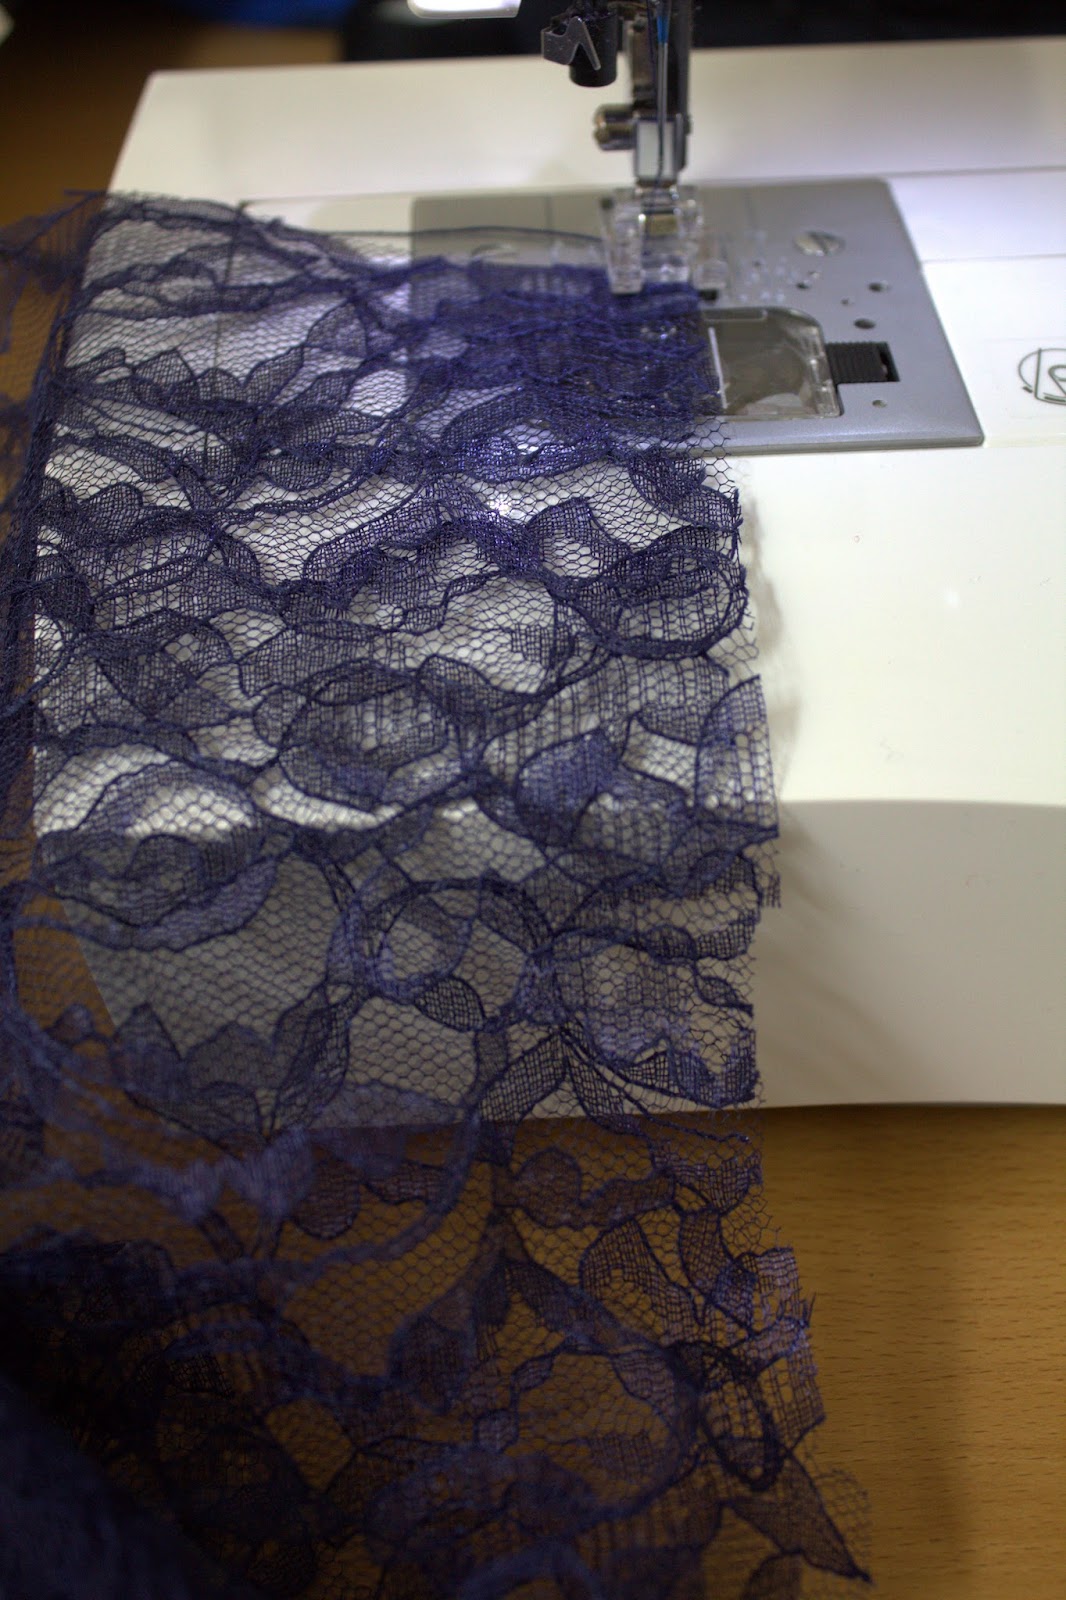
6. With the wrong sides pinned together we are going to sew a 1/4" straight seam along the sides (for the time being leave the lace as a rectangle).
7. After you have sewn the sides and the top of the shoulder, you are going to flip the lace inside out and press out the seam (set the iron temperature to the appropriate setting for lace) so that it is flat.

8. When the seam is pressed out and the lace is turned so that the right sides are now facing, sew a 1/4" seam again. This will create a seam on both sides of the fabric. The edge of the first seam will be encased in the new seam. If there is any lace sticking out, be sure to trim it down so that it is not visible.
9. Almost finished sewing the sides! Yes, it's a lot of sewing but it will help the lace hold up and not fray. At this point you will have a seam on both sides. Take the side that is sticking out and iron it flat in one direction. You will lay down this part and sew a seam on the outside. After it is sewn the seam should lay nice and flat. You will end up with a rectangle of lace (we are not going to sew the lace to the sides of the sweater because it might tear when worn), we will trim the arms and neck lines next.
10. Pin the lace to the bottom band, position it how you would like it to show. We are pinning the lace to mark the arm and neck lines so you don't need to have it completely pinned ready to sew. If your lace does not have a decorative edge like mine, you will need to fold and hem the lace.

11. Take your tailor's chalk and trace the outline of the shoulder seam on your lace. Don't forget to trace the back of the arm too. Leave 1/2"-1" for the seam allowance.

12. Trace around the outside of the neck band so that you have 1/2"-1" for the seam. Trim the excess lace around the neck band. Remember you will also need to clip the lace along the curve of the arms and neckline so that it will fold nicely for the hem. For a good tutorial on how to clip curves, check out Ashley's tutorial here.


14. After you have pinned and folded the seam you will begin sewing the lace down on the existing seam. Be sure to stretch the sweater as you sew the lace down so it maintains its stretch.

15. When the neck, arms and bottom band have been sewn you are done! Clap your hands and pat yourself on the back, good job you're finished!
 |
| Front |
 |
| Back |
2 comments:
very nice
you are talented and amazing:)
Post a Comment