
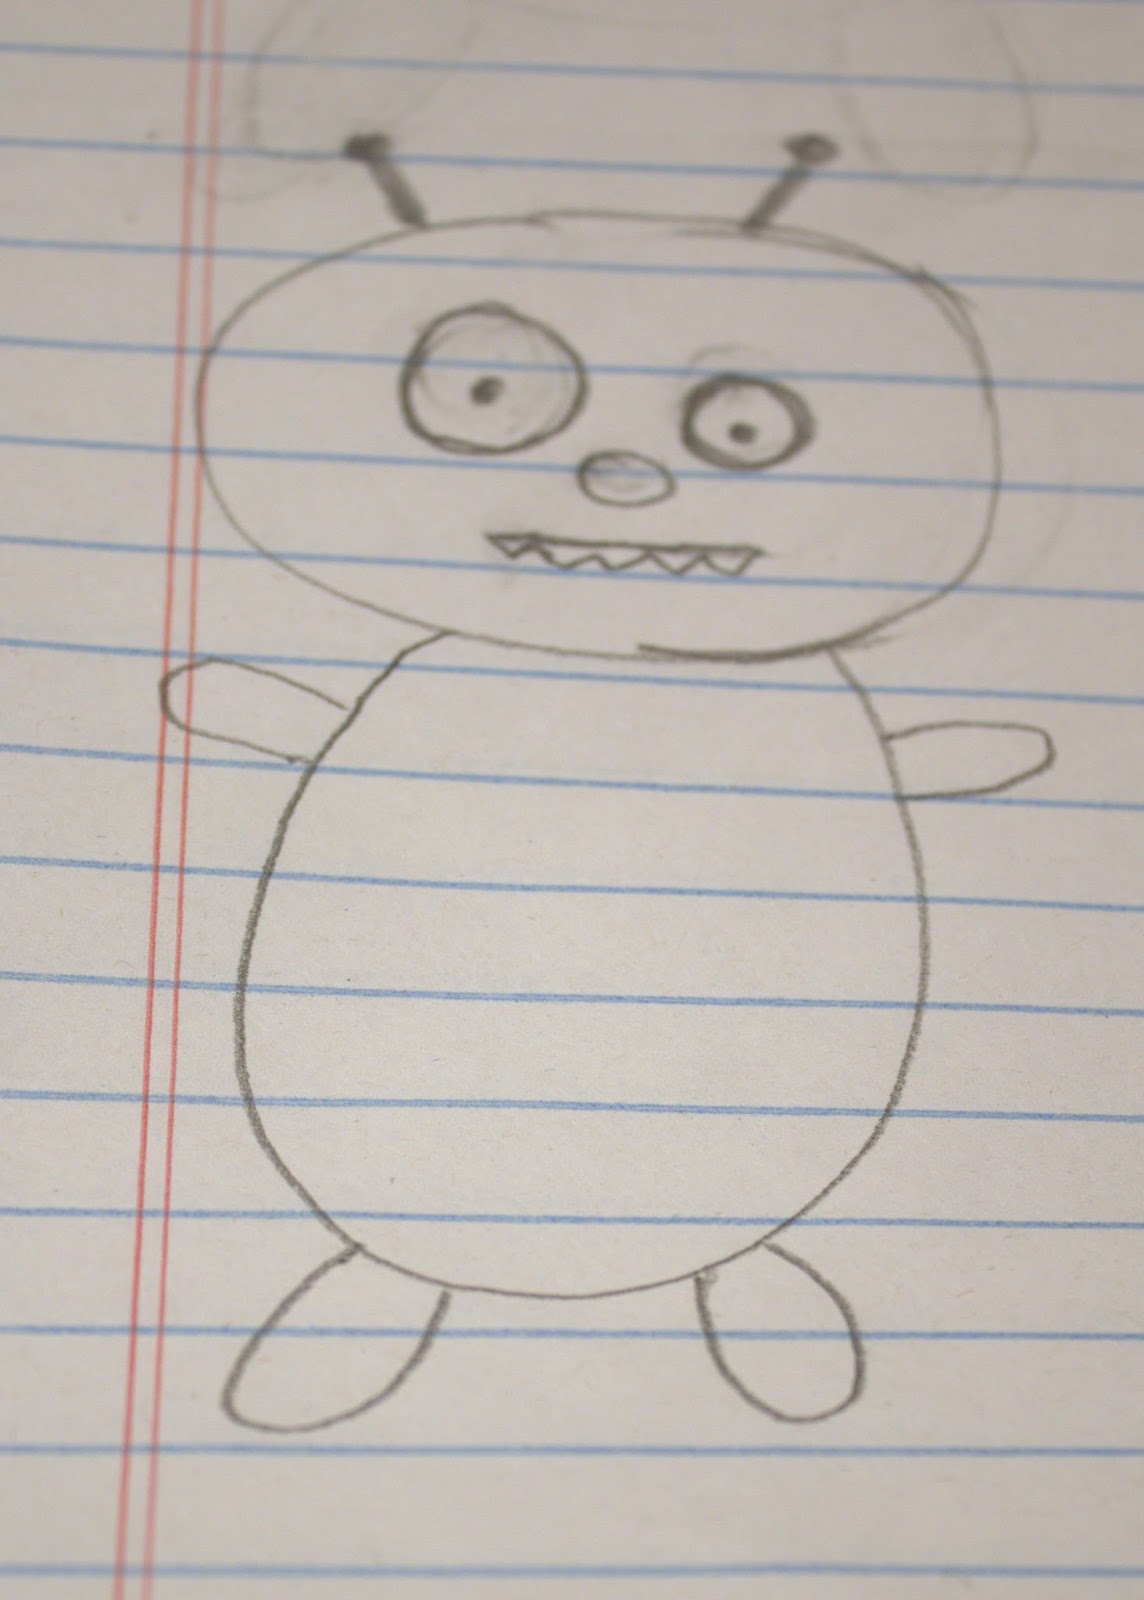
In my other tutorial I showed you how to make the face of a softie monster but I didn't show you how I made the softies. You can use the patterns I did for my monsters or you can draw your own. If you're going to draw your own pattern, don't worry about the little details. Sketch out the outline and figure out the details once you have cut out the body of the monster. If you want to use the same monster pattern I am using, you can find it here. I apologize for not taking pictures every step of the way, I didn't think about writing this post until after the fact.


If you are a computer wizard like my husband, you can turn your sketches into images using Adobe Illustrator. I don't have computer skills so I had to ask my husband to turn my drawing into a pattern (but I ended up not using the pattern I made...I know, shame on me).
This project can be sew without a sewing machine but that would require a lot of stitches so I HIGHLY recommend using your machine to sew up your monster.
Let's get started with the tutorial!
Supplies:
1. Your monster pattern
2. Fabric marker
3. Scissors
4. Sewing machine
5. Hand sewing needle
6. Matching thread
7. Stuffing (*note: a 12oz bag will stuff about a dozen monsters if not more)
8. Fabric for your body and for the features - I made mine out of felt and used embroidery floss for the features
Instructions:
1. Trace out your monster on your material with your fabric marker. I glued my pattern to sturdy builder's paper, from Home Depot, that we had laying around. I used felt for my project but you can use almost any type of fabric for this project.

2. Pin together your fabric around the outline of the monster so your fabric does not shift when you cut out your monster.
3. Next, create the features of the monster. Cut and attach them to the front side of the monster. When I attached the facial features I went overboard and glued them on, let them dry and then sewed them on by hand once they were dry. When I glued my felt features I tried to avoid putting the glue close to the edge because once it dries it is hard and difficult to sew through. I used felt glue for my project but you can also find fabric glue if you chose not to use felt for your monster softie. To add an embroidered smiling mouth you can view my previous tutorial here.
4. Determine the best place to leave the opening (for turning your monster right side out). Starting from the end of the opening, sew around the edge of your monster and stopping at the other end of the opening. Sew slowly especially if your monster has a lot of curves. After your sewn around the perimeter (minus the opening area) inspect the reverse side and sew over any areas that may not have been sewn properly the first time. I had to do this in the curved areas because the felt would get caught in the feeder feet.
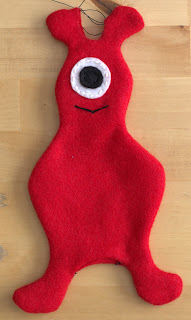
5. Turn your monster right side out. With my red monster I had to leave two openings, one for reversing and stuffing and the other because it was difficult to sew and turn the antennas. I hand sewed the inside part of the antennas and stuffed the red monster through the bottom opening. With the other monsters I only needed to leave one opening on the bottom for turning and stuffing.
6. Try not to over stuff your monster (you don't want the seams to explode during playtime). If your bag of filling does not include a stick for stuffing, you can use a spare chop stick to push the stuffing gently into the small parts of the monster. Once your monster has been stuffed, sew up the opening using a blanket stitch (if you need more pictures on how to do a blanket stitch, you can find a great tutorial here) and clip the end of the thread as close to your knot as possible.


Yeah you have a finished monster!!! Aren't they cute? I made 18 (for favors) and they all found good homes after my son's birthday party.
4 comments:
So Sweet! Thank You. My toddler grandson and new baby-on-the-way are moving to Texas from Boston to be near us this summer. I can't wait to have sweet softies for them.
That's so exciting! I'm sure the little ones will love the monsters. :) Feel free to email me pictures once you make your monsters.
Thanks for the tutorial, I love the monster look. Just pinned it by the way.
I love that you can customize these monsters with different patterns.
Post a Comment