My tween-age cousin ripped her jeans during P.E. so I told my grandma to bring them to me so I could fix them up. I had the pants in my sewing room for a few weeks before I finally settled on an idea as to how I would fix them to make them look pretty/ trendy.
I decided on a pretty easy and straight forward fix, but I did have to do a little ripping and tearing in addition to my sewing...yup, that's right, I destroyed the jeans a little more to achieve this look. Also, this sewing can be done by hand...I only used my machine for the sake of saving time.
Supplies:
1. Sewing machine with denim needle or large hand sewing needle for denims
2. Thread to match the denim color
3. Measuring tape
4. Scissors
5. Lace of your choice (I used 100% cotton crochet lace)
Instructions:
1. Measure the size of your rip and cut your lace to be an inch longer than your measurement.
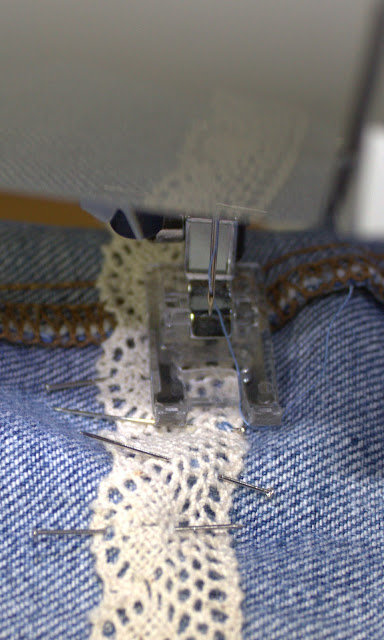
2. On the right side of the jeans, brush the frayed material to it's proper position so it doesn't look like there is a rip. Fold over the ends of the lace and pin it in place on the wrong side of the jeans.
3. Carefully placing the jeans under your machine...this takes a little wiggling and funky positioning to get it situated under the needle (and so you don't sew through both sides). One your jeans are in place, sew a zig zag stitch along the top (starting at either end) and pivoting at the corner and sewing down that side, then continuing around the entire piece of lace.
4. Once you have stitched the lace, turn the jeans right side out and inspect the ripped area. I trimmed a little here and there on the ripped section to expose the lace "patch". I wanted it to look like it was peaking through and in some spots I had to cut away part of the jean material and fray it. I achieved the fray look by removing the a few threads from the jean fabric weave.
5. You're done! Pretty easy, huh? The most difficult part is getting the jeans in the right spot under your machine! Trust me, it took years of being lazy to perfect that technique ;) Ha ha ha....just kidding!


No comments:
Post a Comment