Translate

Showing posts with label Hawthorne Threads. Show all posts

Wednesday, September 5, 2012

Project of the Moment - Fishsticks Designs Pants


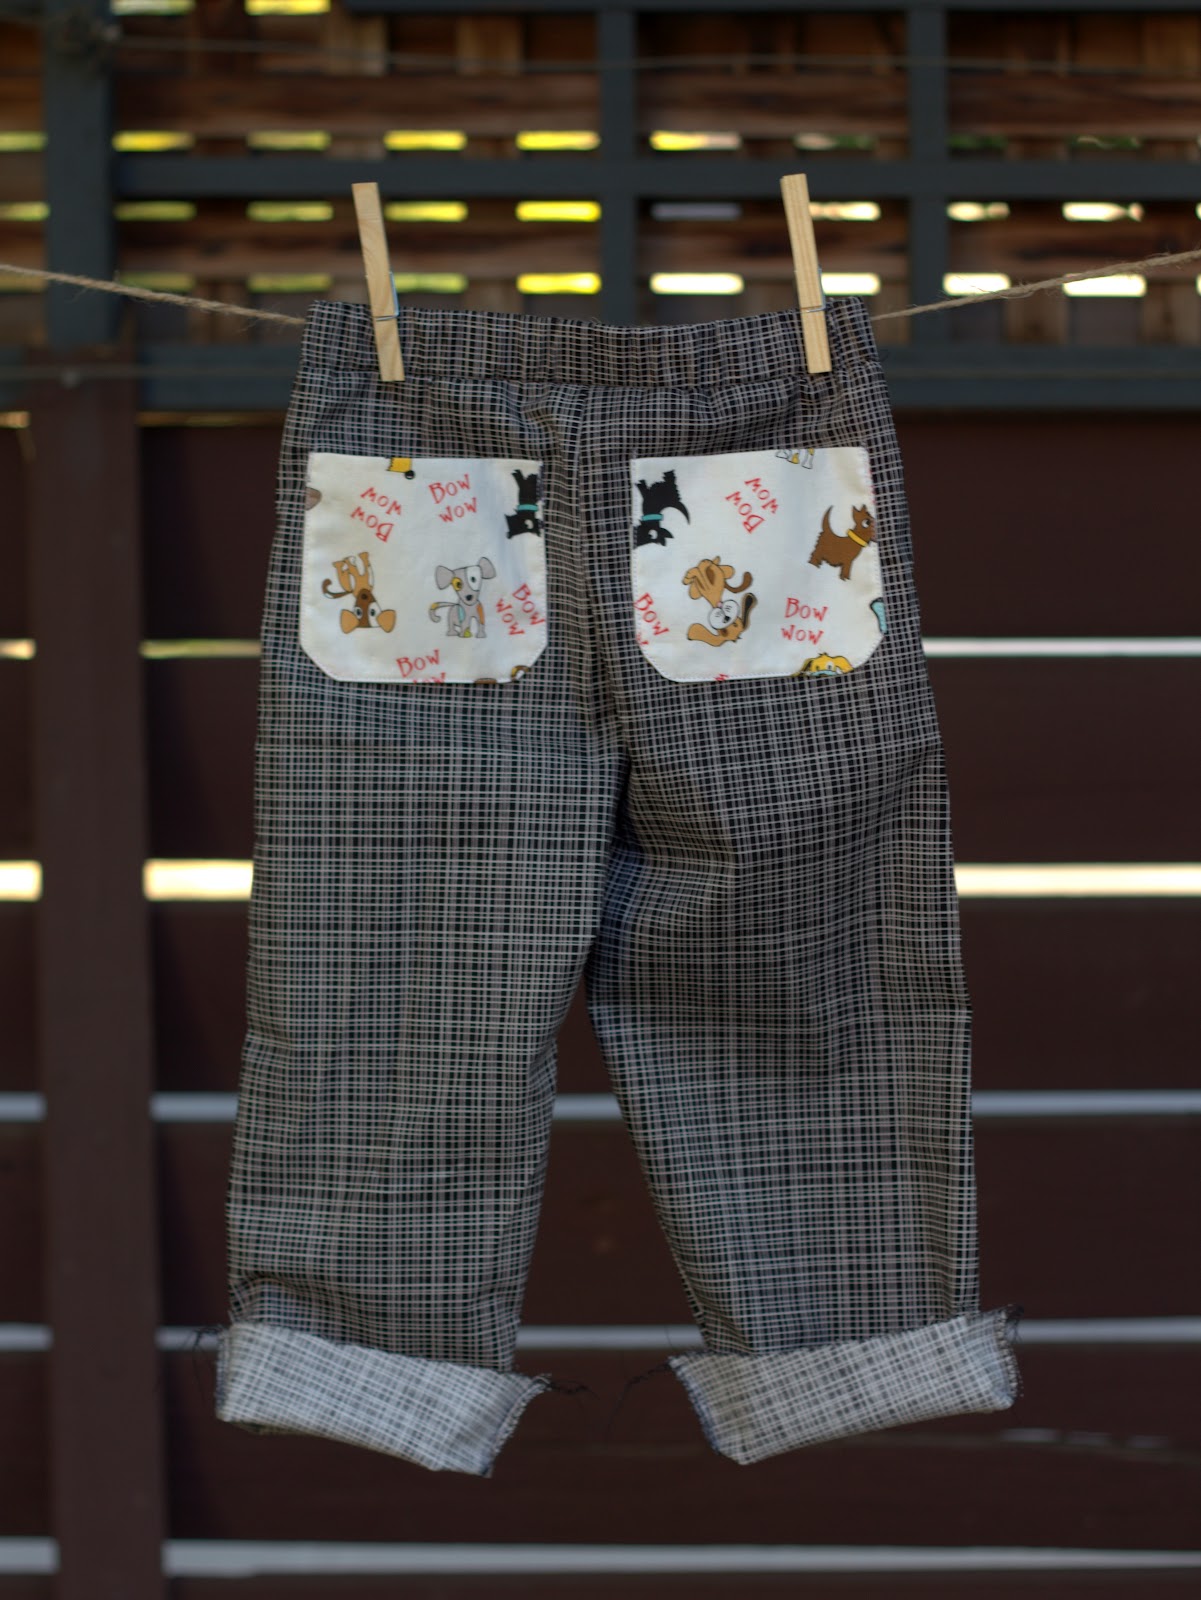
I am pretty open about my love for Hawthorne Threads, there's just something about them...maybe it's their awesome website, wonderful blog/newsletter or their great customer service (no, they didn't pay me to say any of that...).  Anyway, a while back I received my email newsletter with their announcement of Riley Blake's Puppy Park Collection.  Often their newsletters include pictures of projects to give you inspiration, and in this newsletter edition they showed a pair of cute little guy pants made with the puppy park crosshatch print in black, the outside pockets and cargo pockets were made with puppy print and a contrasting trim (of bone print fabric).  I searched and searched to try and find the pattern to make the same exact pants for my little guy (because dogs fascinate him right now), but I couldn't find the pattern anywhere or even a picture of the same pants online so I contacted Hawthorne Threads.  They informed me they couldn't find the exact pattern either and they forwarded me the link for a similar pattern (but I wanted to make the exact same ones in Riley Blake's picture!  I can be a little neurotic when I see something I like, because I want to make the same exact thing (am I the only one like that?)

After I received their email I decided to look a second time on Etsy to see if I might be able to find the pattern and I did!  I jumped up and down with joy and bought the pattern.  I only used 2 of the 3 fabric that were shown in the Riley Blake example.  In retrospect I should have ordered the bone print fabric to use for the trim and make the pockets "pop".  Since I made the trim the same as the main fabric, the edge of the pockets blends into the pants.  Oh well...next time I know 3 fabrics are better than 2.

Front Pocket
Front View of Pants
My label and new size label!
Back View
I rolled up the cuffs so you can see that the legs aren't super skinny.
Back Pocket
Elastic Waist View
Now let's talk about the inside or outside pocket pants pattern by Fishstick Designs...

I really liked the pattern and I thought it was easy to read and follow the instructions.  I used my newly acquired 1/4" patchwork foot a few times while sewing (for the sake of ease), you don't need to have that foot to sew this pattern.  From cutting to sewing, the pants came together fairly quick (even my husband noticed I finished in record time!).  I cut these out in a 3T and left the hem undone so I can hem then when Nik grow into them  (I'm trying to sew most of Nik clothes now so I can use the fabric stash I accumulated this last month...yes, it's a massive amount).  This pattern is very versatile, it can be used for boys and girls...and as the pattern says, the pockets can be cut for the inside or outside of the pants (this means there will be plenty more pants in the future!).        


Tuesday, July 24, 2012

Project of the Moment - Chicks Dig Dinosaurs

Fin!  Ok, even though I didn't sew all of the projects from my sewing for kids class (I don't plan on sewing the bonnet and I need to try making a shirt again), I finally feel the weight off my shoulders. This project is the last project I was worried about completing before my access to the class website expired.  

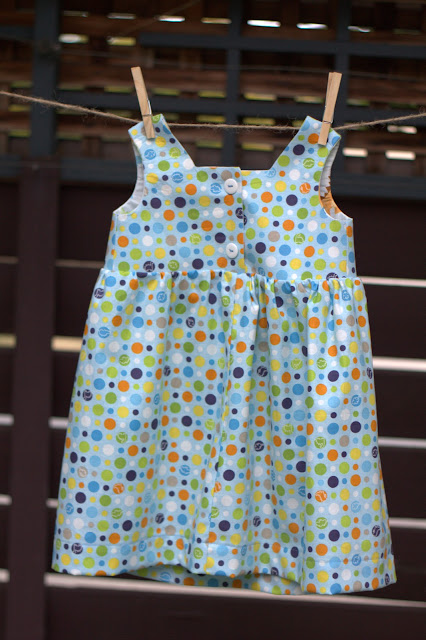
Dress Front
Dinosaurs!
Back opening with buttons!!
Dress Back
For the inside lining I put more dinosaur fabric...you can't really tell but the print isn't one direction.
I added my tag so I could write the size, I really need to get size labels.
Isn't it cute?  I must have sewn this in record time, in fact it all came together so fast that my husband was amazed.  I cut out the pieces on a Tuesday night while making dinner.  On Wednesday night I cut out the interfacing and attached it to the bodice, put the baby to sleep and finished sewing the bodice, attaching the skirt and making the button holes!  Then, on Thursday night I sewed on the buttons (by hand, I guess I didn't get a button foot with my machine, oops!) and made the hem.  Needless to say, my fear of making button holes has been conquered.  I no longer have to put a pattern back in the bin if it calls for buttonholes.

For this project I was inspired by the fabric and I thought it would be perfect for a special little lady I know who loves dinosaurs.  The colors and the pattern of this fabric collection by Little Yellow Bicycle is great for both boys and girls.  I just wish I would have had something like this when I was little...I would have loved it!  Once upon a time I loved dinosaurs sooo much that I memorized facts about each and every single one.  This was my favorite book (it may be a tad outdated now):


I was introduced to dinosaurs by my Uncle Edward and I remember him beaming with pride when he would tell the story of how his 5 year old niece informed her teacher that there is no such thing as a brontosaurus. Of course my teacher didn't believe my story of how the brontosaurus had the wrong head and it was actually an Apatosaurus.  Oh how I digress...anyway, I'm very happy with the outcome of this dress and I can't wait to see little HB wear it. 

Tuesday, July 17, 2012

Project of the Moment - Reversible Jacket


I had the most difficult time selecting fabrics that I like that were fun and cute (not plain) but also boyish.  I searched my local stores and didn't find anything I really loved so I started looking online.  I ended up buying the majority of my fabric from Hawthorne Threads, they have so many fun fabrics and they make it super easy to find what you need. 

For my son's reversible jacket I wanted the print to be colorful and fun but not a "in your face" kind of print so this is what I selected:

For the main fabric:

For the lining:


I guess you could argue that there really isn't a "main" fabric since it is reversible. I don't know where I went wrong but the jacket didn't really come together as nicely as Deborah's did in her videos. I mean...the jacket looks ok but I had to redo a few parts, I think it's because the 14" zipper I selected was a little too long.  I also didn't have fun installing the zipper, but I must say that my zipper sewing skills are improving. If I ever make the jacket again, I'm going to try using a fully reversible zipper so it's easier for Nik to put on and take off (right now he still needs help so the one sided zipper is fine).


Now that the jacket is finished I have one more "big" project (a dress) and two smaller ones (a bib and a bonnet...but I don't plan on making the bonnet), which should be easy (except that the dress calls for buttons...eeek!).

On a side note, during my break from sewing the jacket I went through Nik's clothes and put away what he out grew and put 18MO and 2T clothes in his dresser. He is definitely set in the clothes department for quite a while...in fact he probably won't need new clothes until the beginning of next year. Which means that I can start making clothes for me without feeling guilty. ;)

Thursday, June 28, 2012

Project of the Moment - Overmost

When I signed up for the Sewing for Kids class I was giving a syllabus with a list or projects and I had no idea what an overmost looked like so I googled it.  In my search result I found Deborah's pattern.  She explains that they really don't cover all, they only cover most...so true!

Front View
At first I thought these might be a lot of work but they really weren't.  They were very simple and easy to make, everything was straightforward.  I actually enjoyed making these because they are so darn cute!  The pattern is written so that they can be reversible but I decided to not make them that way since the other fabric I selected is white.  I couldn't resist the bunting pattern fabric, I just had to use it so I bought it to use for the lining.  

Outside Front Pocket
Front View and Pocket
Back View with Pocket
Buckle Strap

Elastic Back
Inside Lining
Originally I had envisioned making these out of baby blue fabric and using the bunting fabric.  I was a little afraid it might look too girly so I contacted the lovely people at Hawthorne Threads and they said they didn't think my selection was girly but that I might want to consider a darker fabric since I was making them for a toddler. 

The color I thought of using for the outer fabric:


With this as the lining:


And this is what I ended up using for the outer fabric instead:


Instead of buttons I used the Dritz Overall Buckle For 1.25 Inch Strap (2 Per Package) - Antique Brass. I opted for traditional adjustable overall buckles for two reason, one, my little guy is growing like a weed and, two, I really haven't practiced making button holes. I guess I just need to sit down one day and practice so I'm ready to add buttons to the dress I'll be making soon.

I really like the way these came out in the end, they look super professional!  I can't wait to make some more for Nik.